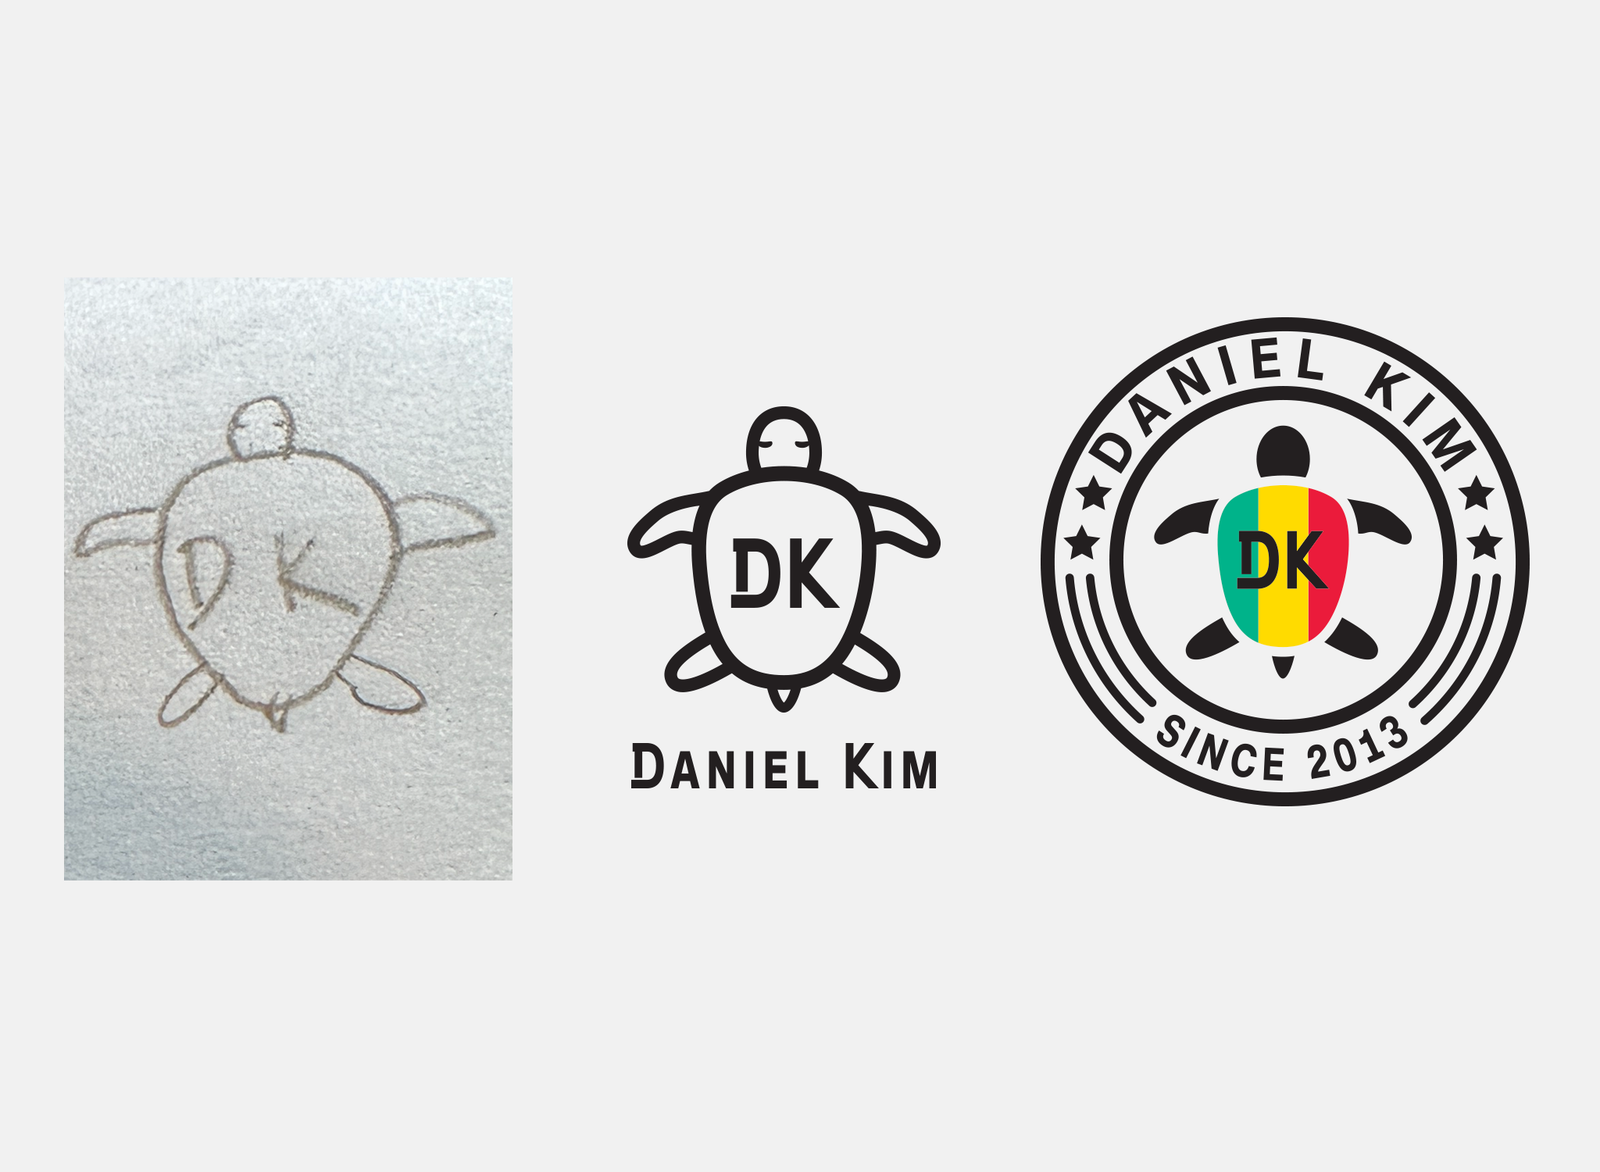
My son drew a little turtle with the letters “DK” tucked inside its shell. It was just a pencil scribble on a scrap of paper. But I couldn’t stop looking at it.
So I did what a designer-mom can’t help doing: I turned it into a real logo, then stitched it onto a hat, a tote bag, an apron, and a tiny zip pouch. By the end, my kid had his own little “brand” — born from his own hand.
If you have a drawing your child made that you can’t bear to throw away, this post is for you. I’ll walk you through the whole journey, from that first doodle to finished embroidered pieces you can actually wear and use. I’ll share what worked, what tripped me up, and the parts I’d do differently.
Why a child’s drawing makes the best logo
Here’s the thing I keep coming back to: kids draw without fear. There’s a wobble and a confidence in a child’s line that no design software can fake. As someone who spent years as a senior artist, I’ve drawn thousands of “clean” shapes. But my son’s turtle had something I couldn’t art-direct into existence: it was his.
That’s also exactly why it works as a logo. A good mark is simple, a little bit odd, and instantly recognizable. Children’s drawings are naturally all three. The turtle was his favorite animal, and the “DK” — his initials — happened to land right in the middle of the shell. It was already a monogram. I just had the tools to bring it the rest of the way.
If you’ve been staring at a drawing on your fridge thinking “this could be something,” trust that instinct. It usually can.
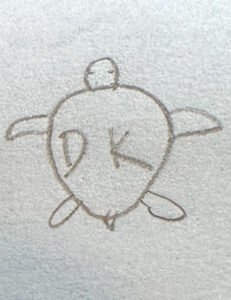
Daniel's original pencil drawing
Step 1: Start with the real drawing
Don't trace it, don't redraw it "cleaner" — use the original. The wobble is the point. Scan it at 600 DPI if you can, or photograph it flat on a white surface with good natural light. I used the Scanner Pro app on my phone, and it worked perfectly. The scan doesn't need to be perfect. You're going to work with it in Illustrator (or Inkscape if you prefer free tools), and the imperfections in the scanned line are what you want to preserve. This case, I just use my pone camera.
Step 2: Turn the doodle into a clean vector logo
Open the photo in Adobe Illustrator. Use Image Trace (Object > Image Trace > Make and Expand) to turn the pencil lines into vector paths. The default settings usually work well — In this case, I just draw with pen tool, to make clean and bold line and I kept the shape of the turtle exactly as Daniel drew it. I typed "DK" letters with text tool. — Save it as an svg for use in the next step.
Step 3: Decide what you're making
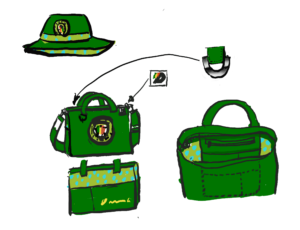
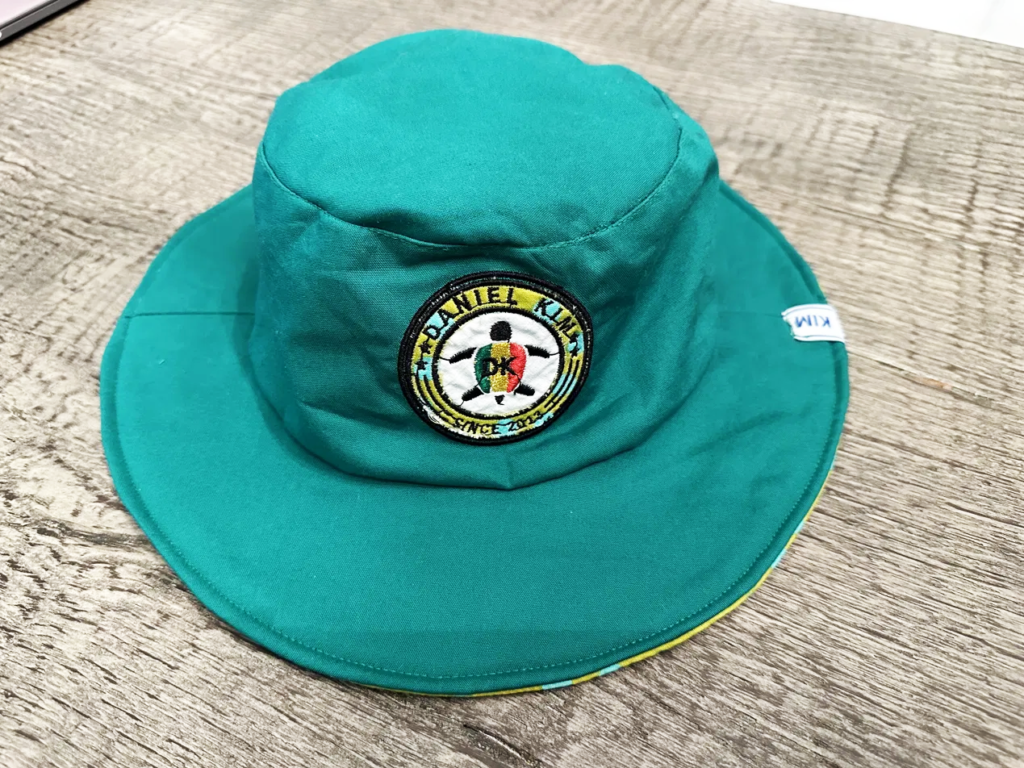
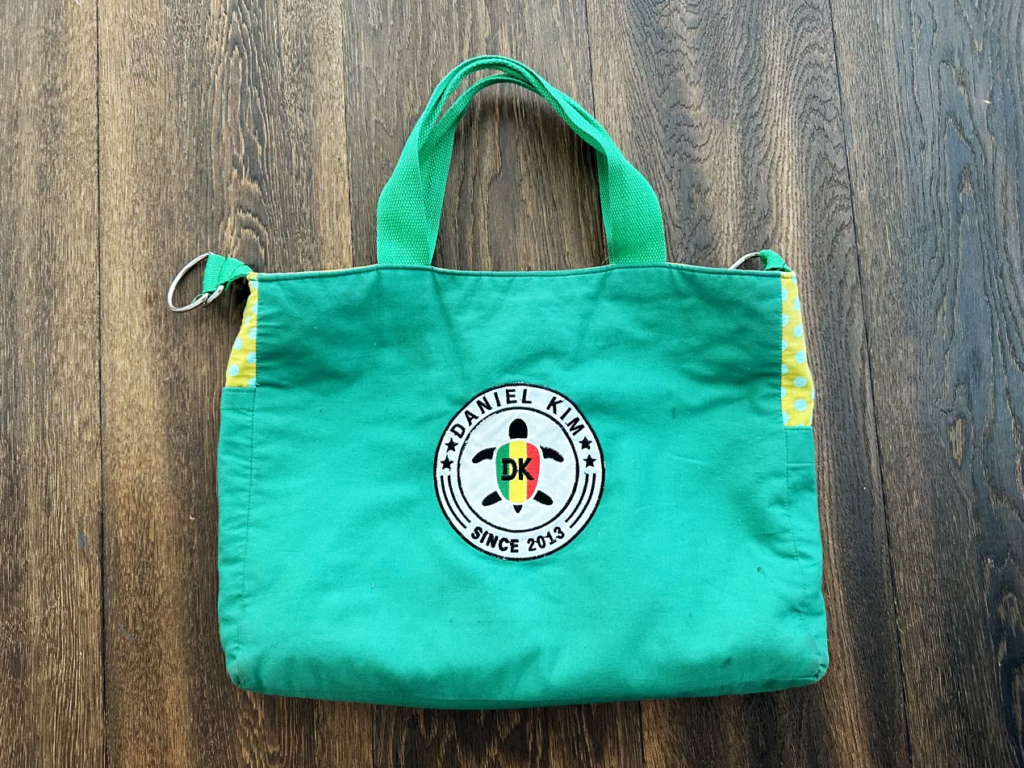
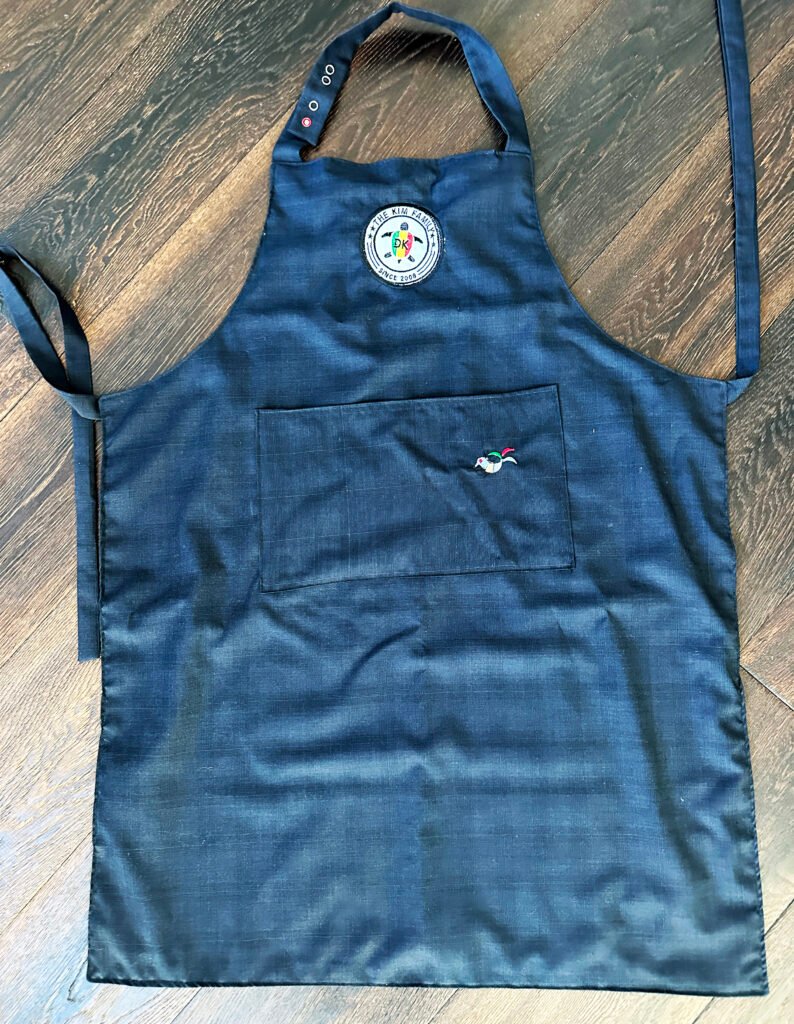
Before you digitize the embroidery file, you need to know the size and shape of each item you're stitching on. Different products need different stitch counts and approaches. I made: • A structured bucket hat (DK Turtle on the front panel, about 3 inches wide) • A natural canvas tote bag (larger version, about 5 inches wide) • An apron (centered on the chest area, about 4 inches wide) • A small zip pouch (tiny version, about 1.5 inches) The size matters because embroidery has minimum detail thresholds — fine lines that look great at 5 inches become blobs at 1.5 inches. So I actually created four slightly different versions of the DK Turtle: one for each scale, adjusting the detail level as needed. I also tested out logo versions added some details and extra text in illustrator.
Step 4: Digitize the design for your embroidery machine
This is where most people get stuck — Digitizing means converting your image logo into an embroidery stitch file (.pes format for Brother machines like the PE-770). You have two options:
1. Digitize it yourself using software like Embrilliance, Hatch, Drawing or SewArt
2. Pay a professional digitizer (usually $10–$25 per design)
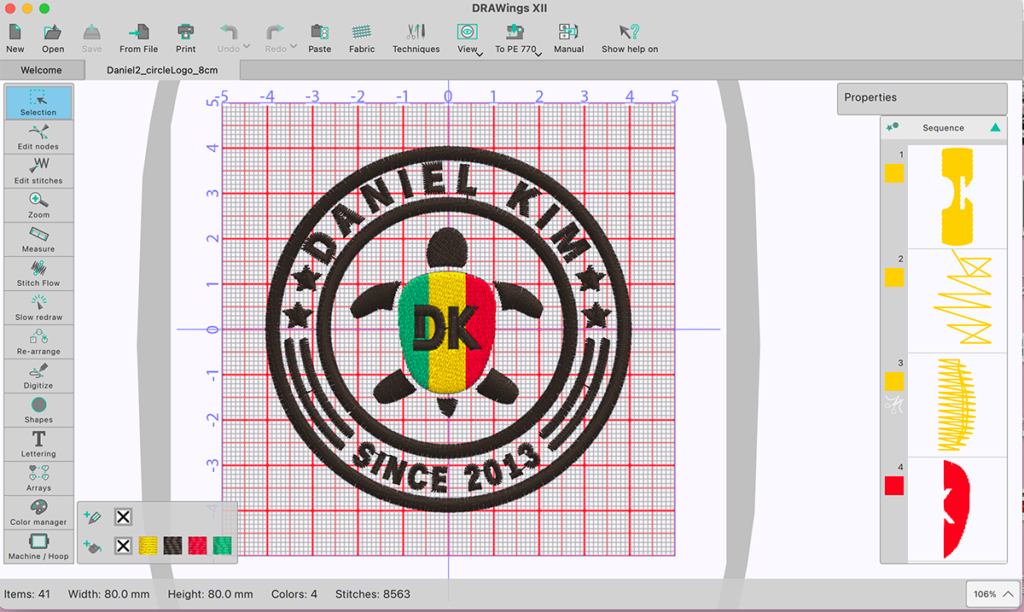
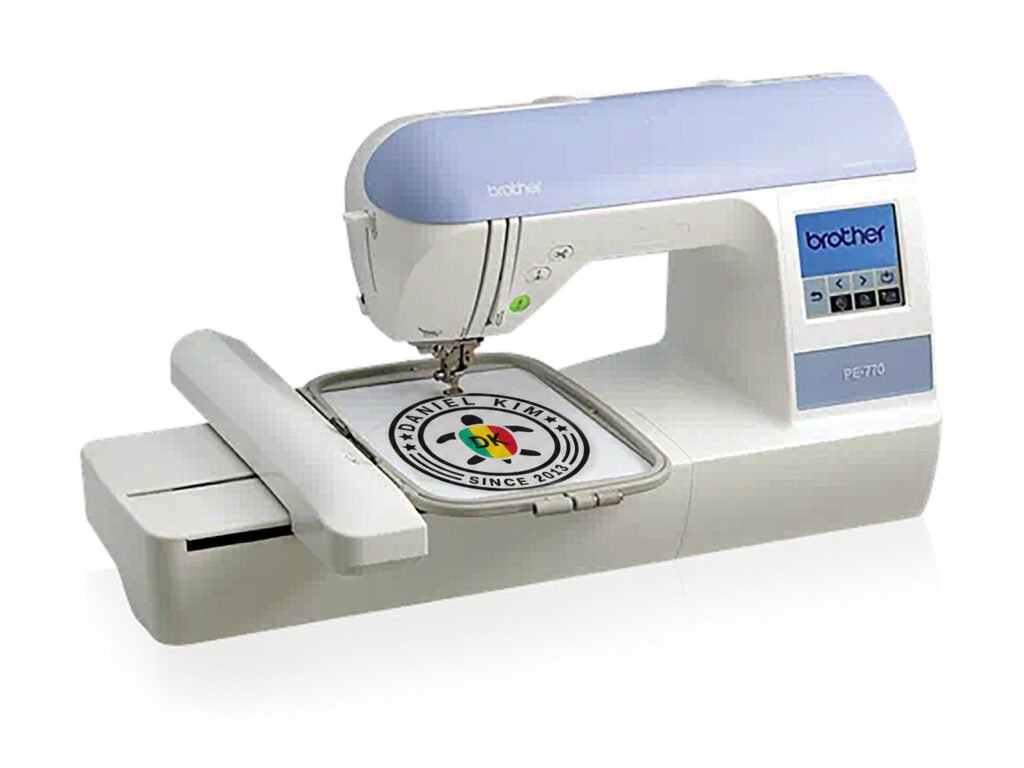
I digitized mine myself using "drawing" software. you can just import svg file from illustrator and export pes format. You can also I control on Outline stitching (running stitch for thin lines, satin stitch for thicker areas) • Fill stitching for the shell markings • Making sure the 'DK' letters were at least 0.4 inches tall — below that, letter recognition gets tricky • Stitch direction to create visual interest in the shell I used my Brother PE-770 for all the stitching. It has a 5"x7" hoop area, which was plenty for every item I made. The PE-770 reads .pes files directly from a USB stick — no computer connection needed.
Step 5: Hoop, stitch, and watch it come alive
For each item, I used a tearaway or cut-away stabilizer depending on the fabric: • Structured hat: tearaway stabilizer, hooped the front panel flat before assembling the hat (easier than trying to hoop a finished hat) • Tote bag: tearaway stabilizer — simple and clean for the canvas • Apron: tearaway — the cotton fabric held well • Zip pouch: I stitched the design on the fabric panel before sewing the pouch together. Much easier. For thread colors, I chose: • Dark forest green for the turtle outline and body • A lighter sage green for the shell highlights • Cream/off-white for the 'DK' letters inside the shell [Author check: Double-check these thread colors match what you actually used. If you have the thread brand/number, add it here for readers who want to match exactly.] Stitching time per item ranged from about 8 minutes (tiny zip pouch) to 28 minutes (large tote).
Step 6: The finished pieces
Here's what came out the other side: • Bucket hat: The DK Turtle sits perfectly on the front panel. Daniel wore it to school the next day and told his teacher he had a logo. • Tote bag: The larger version of the design has more visual impact. I use it for grocery runs. • Apron: My favorite piece, honestly. The turtle looks like it belongs on the chest of a little chef's uniform. • Zip pouch: The tiny version at 1.5 inches was the hardest to stitch cleanly, but it worked. Daniel uses it for pencils. [Author check: Add your real reaction here — what did Daniel say when he saw the finished pieces? The emotional moment is what readers will connect with most.]
What this really cost
Common mistakes to avoid
1. When saving as SVG from Illustrator, avoid using too many layers. Organize by color into a single layer per color, then combine everything into one Compound Path so it exports as a single unified shape — this prevents errors and makes the process much smoother.
2. If you want to adjust the thickness of a circle line (or any stroke), don't use Outline Stroke or Expand in Illustrator. Keep the stroke live, and you'll be able to adjust the line weight directly inside the Drawings embroidery software while previewing it.
3. In the Drawings program, you can change colors and reduce the number of colors used. Keep in mind that the number of colors equals the number of thread changes required on the embroidery machine — so grouping similar colors together into one saves a lot of time and effort.
4.The Drawings program has a preview screen, so always check the stitch count and appearance before finalizing. If something doesn't look right, you can adjust the stitch direction and other settings from there.
Frequently asked questions
Do I need a Brother PE-770 specifically?
No — any home embroidery machine that reads .pes, .dst, or .jef files will work. The PE-770 is what I have and recommend for home use, but a Brother SE700 or Janome or even a Bernina will work fine. Just check what file format your machine uses before you digitize.
Can I use a photo instead of a drawing?
You can, but it's harder. Photos have too much detail for embroidery — you'd need to heavily simplify them first. A child's drawing already has the bold outlines and flat areas that make for good embroidery. That's part of why they work so well.
What if my child's drawing is very detailed?
Simplify it before vectorizing. Focus on the main outline and one or two key details. You'll lose some nuance, but embroidery rewards simplicity. Think of it as a logo, not a reproduction.
How do I find a digitizer if I don't want to do it myself?
Etsy is full of embroidery digitizers who work fast and cheaply. Search "custom embroidery digitizing" and look for sellers with high ratings and quick turnaround. Expect to pay $10–$25 for a simple design. Send them your SVG or PNG, tell them the size, and they'll send back a .pes file.
Can I sell items with my child's drawing on them?
As long as the drawing is original and not derived from copyrighted characters (so no, you can't turn your kid's Minecraft drawing into an embroidered product to sell). Original characters and designs are fine.
A last thought
The best part of this whole project wasn’t the hat or the tote. It was watching my son realize that something he made with a pencil could become something real — something we use every day. That’s a feeling I’d wish for any parent.
So if there’s a drawing on your fridge that keeps catching your eye, start with just one step: scan it. You can figure out the rest as you go, and I’ll be cheering you on.
If you try it, I’d love to see what your little one drew — tell me in the comments.