No Sewing Machine, No Store Could Help
My son came home one afternoon and announced he’d been cast as a salamander. Not a frog. Not a dragon. A salamander. And the play was just a few weeks away.
So I did what any parent does first — I went looking online for a costume to buy. That’s where the whole adventure started, because it turns out the world does not sell a spotted-salamander costume for a small child. Not anywhere I could find.
If you’ve ever been handed an oddly specific costume assignment with a deadline, this one’s for you. I want to walk you through how I made it — entirely by hand, because I didn’t even own a sewing machine yet — and what I’d tell anyone about to try something like this for the first time.
When the costume you need simply doesn't exist
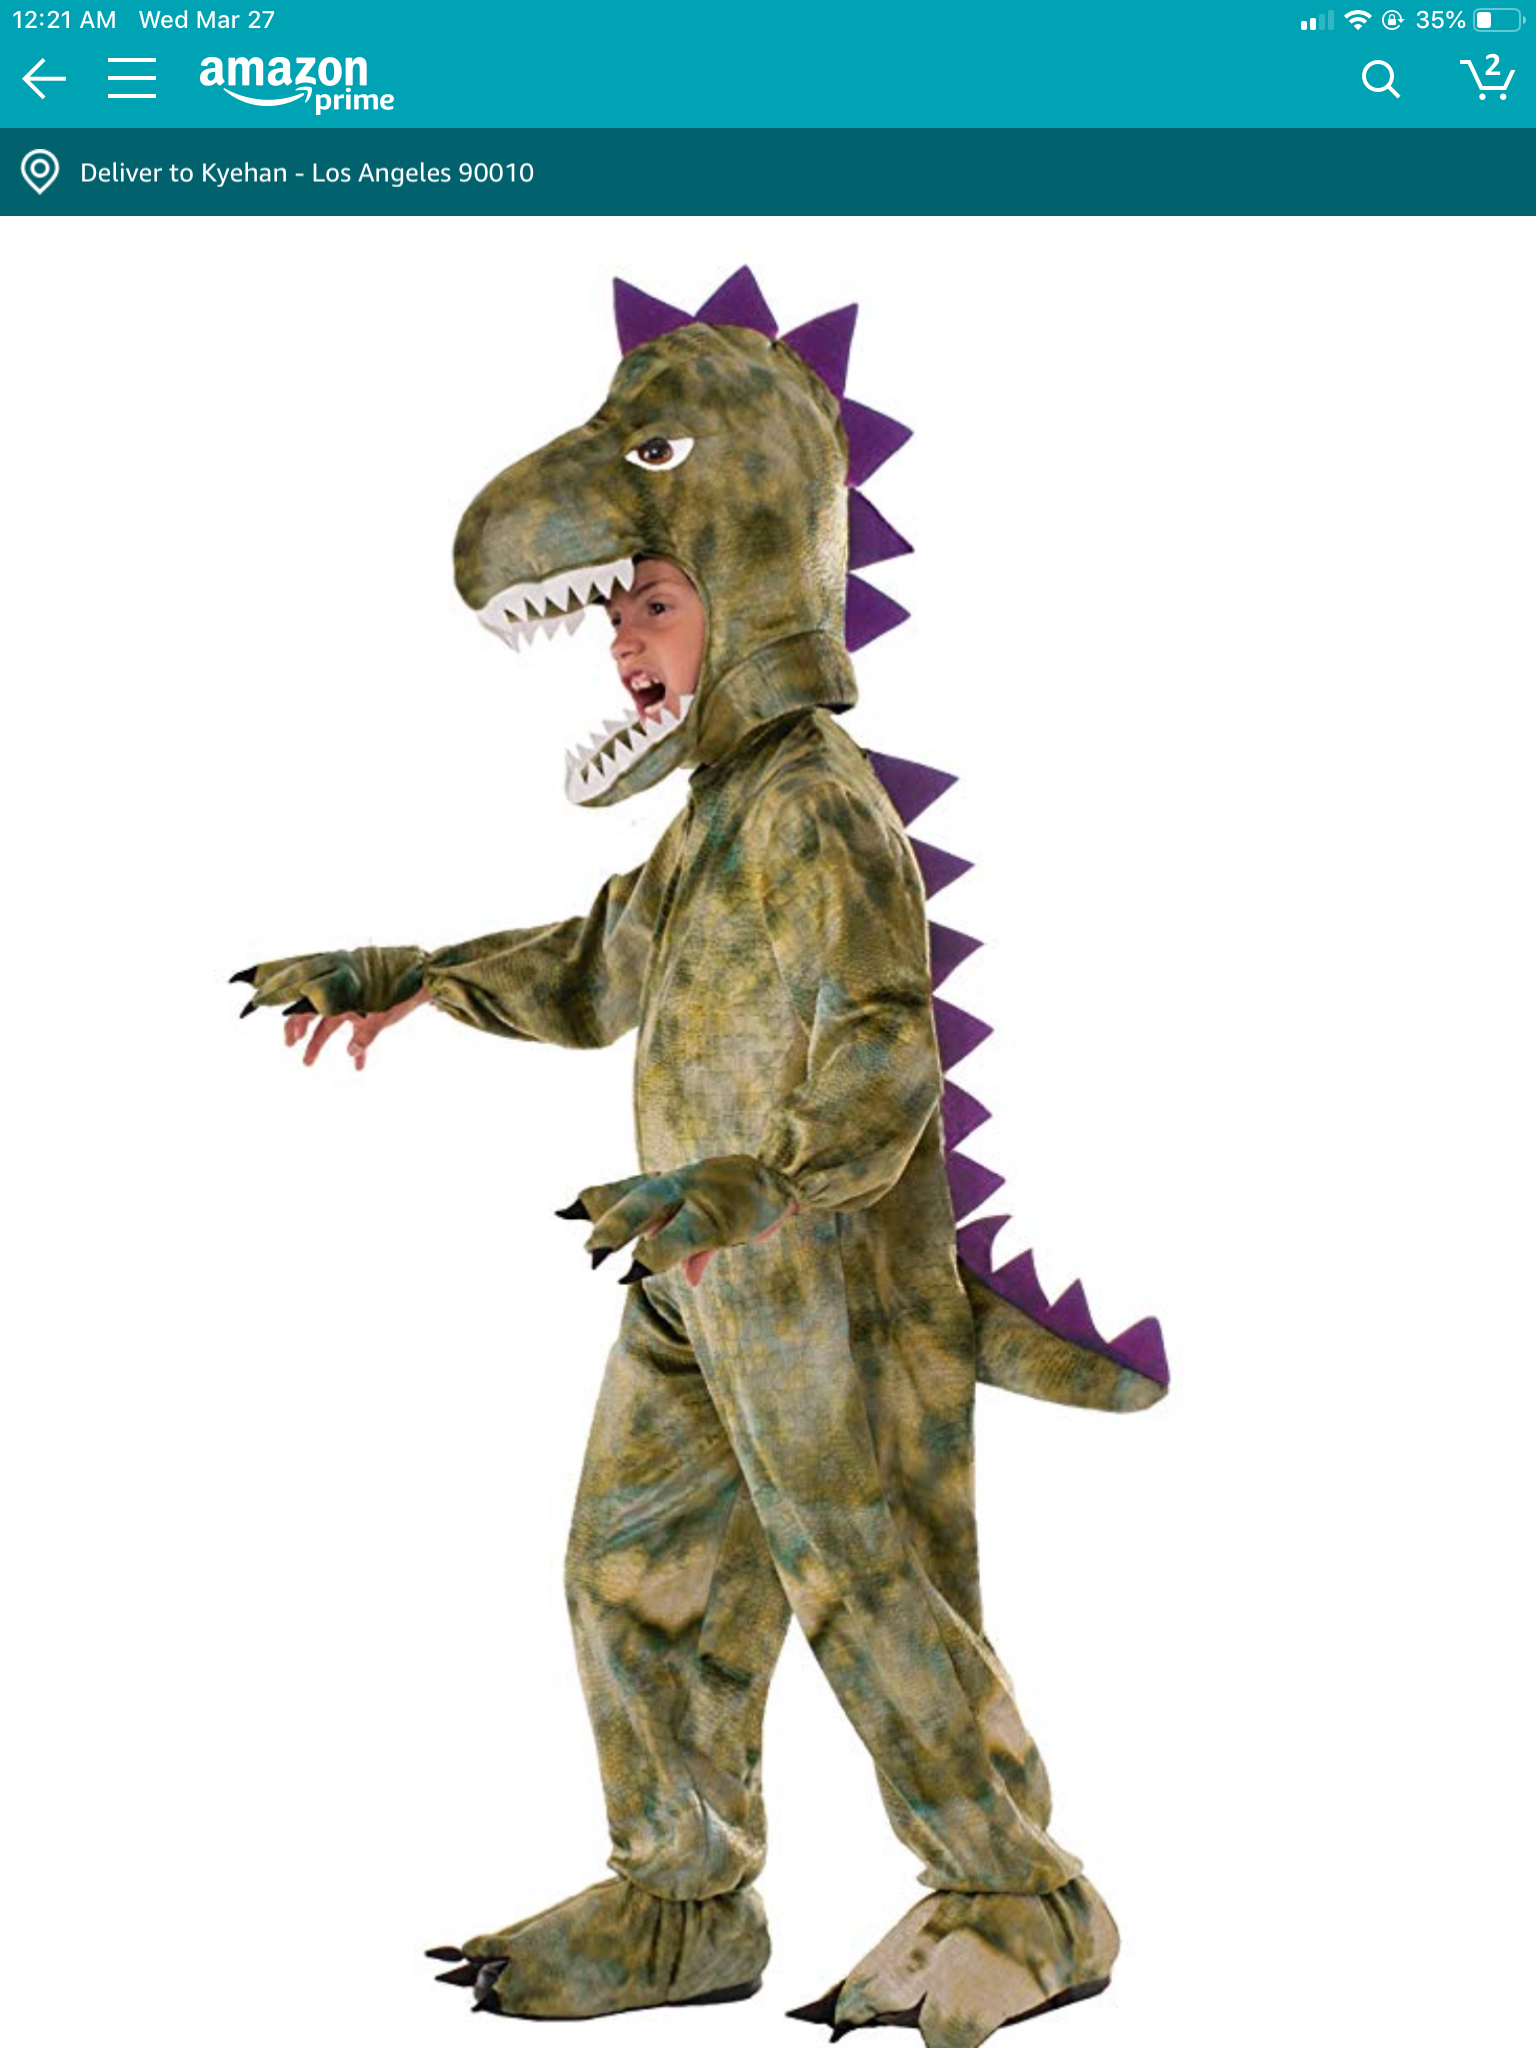
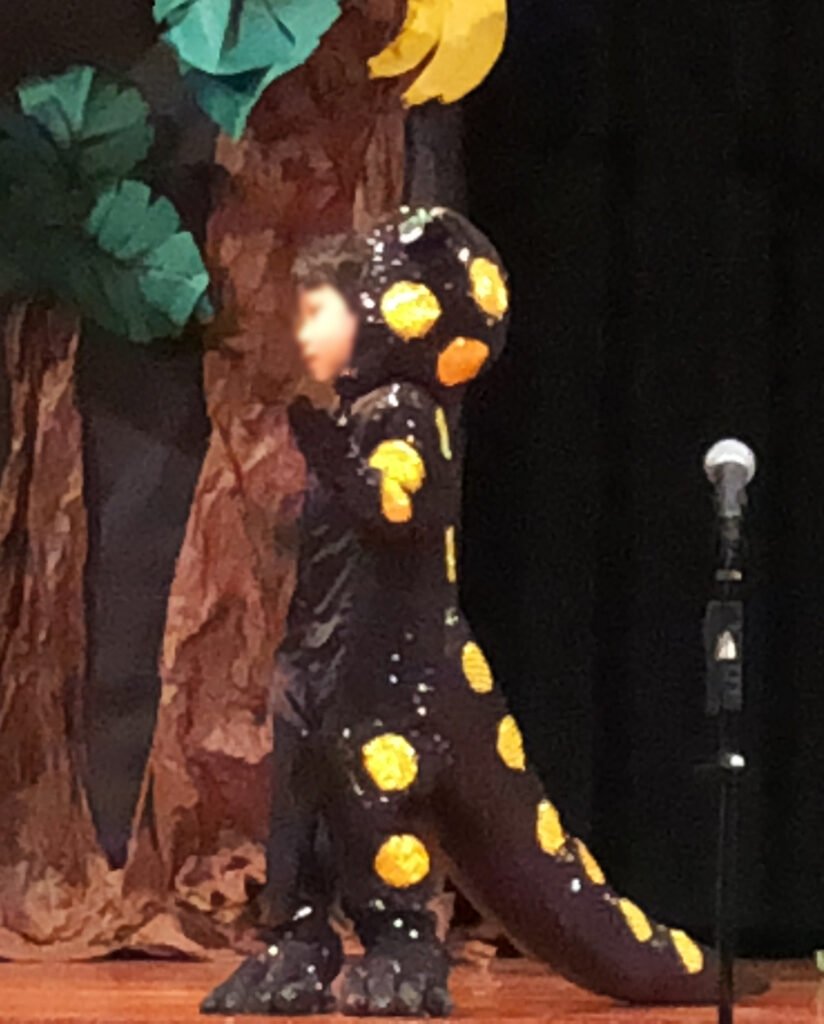
Here’s the thing about a salamander costume: nobody makes one. I searched and searched. The closest cousin I could find in any costume Amazon was a green dragon costume — cute, fluffy, totally wrong color, totally wrong animal.
But I didn’t dismiss it. As a former designer, I’ve learned that the wrong reference can still be a useful reference. That little dragon suit showed me something important: the silhouette. The way a one-piece body suit with a hood, a belly panel, a tail, and little hands and feet all hang together on a child’s body. I studied its shape, its proportions, where the seams sat — and then I set the dragon aside and went after the real animal.
![the store-bought green dragon]](https://pearlofgraceliving.com/wp-content/uploads/2026/06/Dragon_costume_002.png)
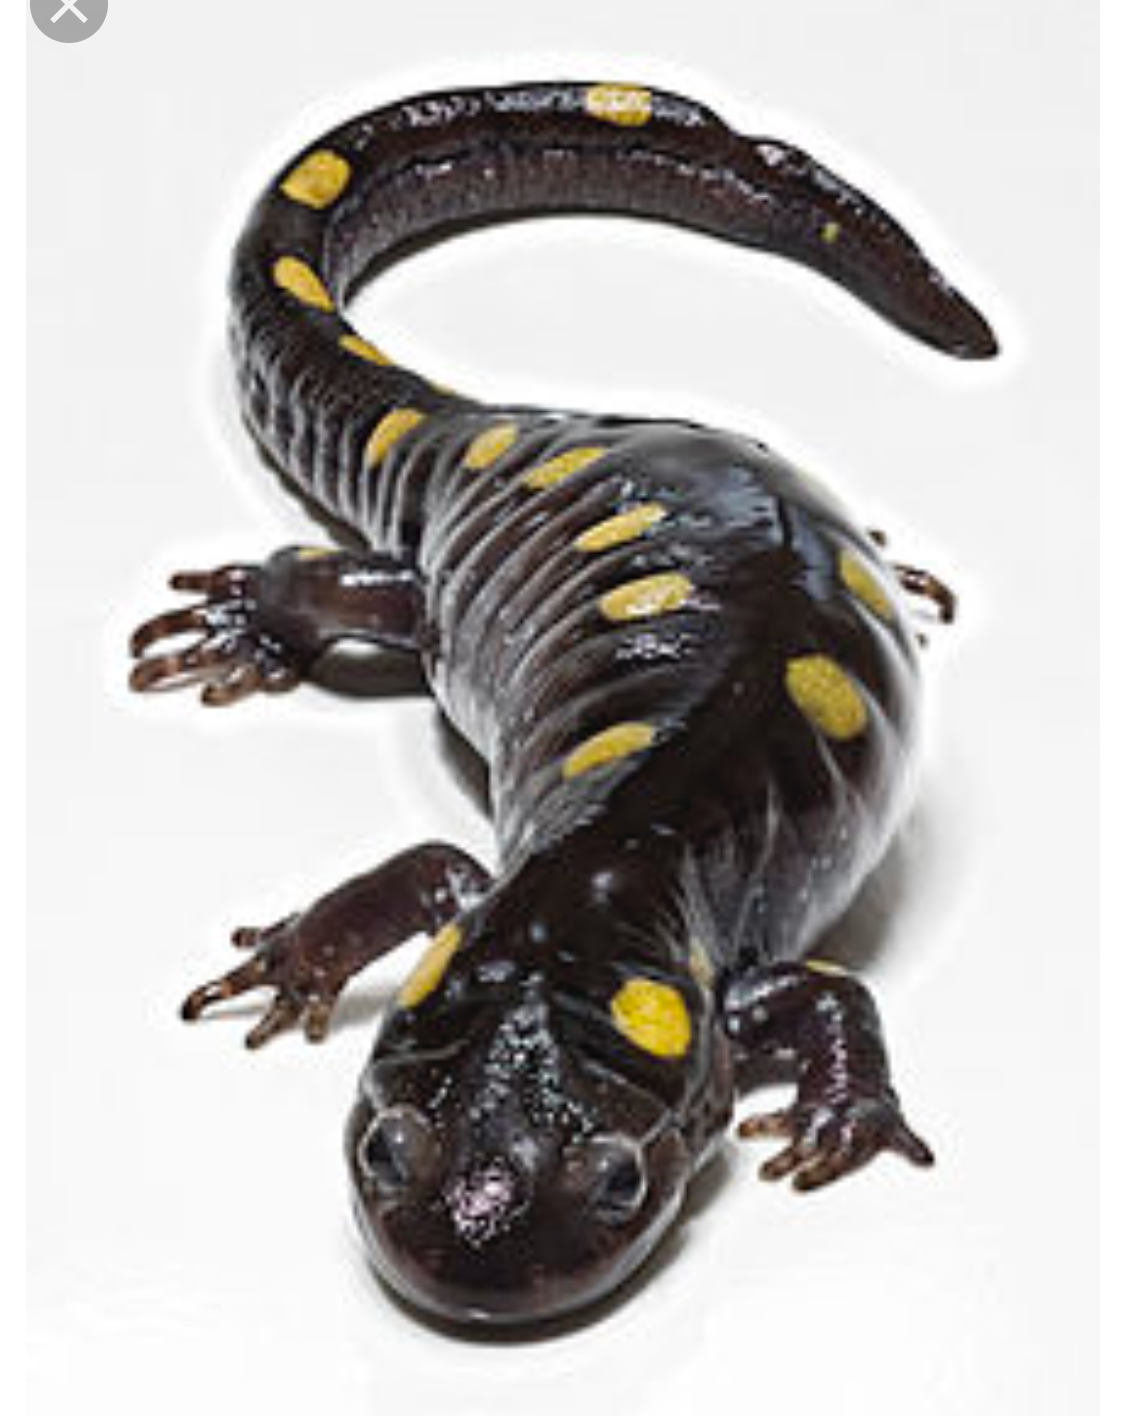
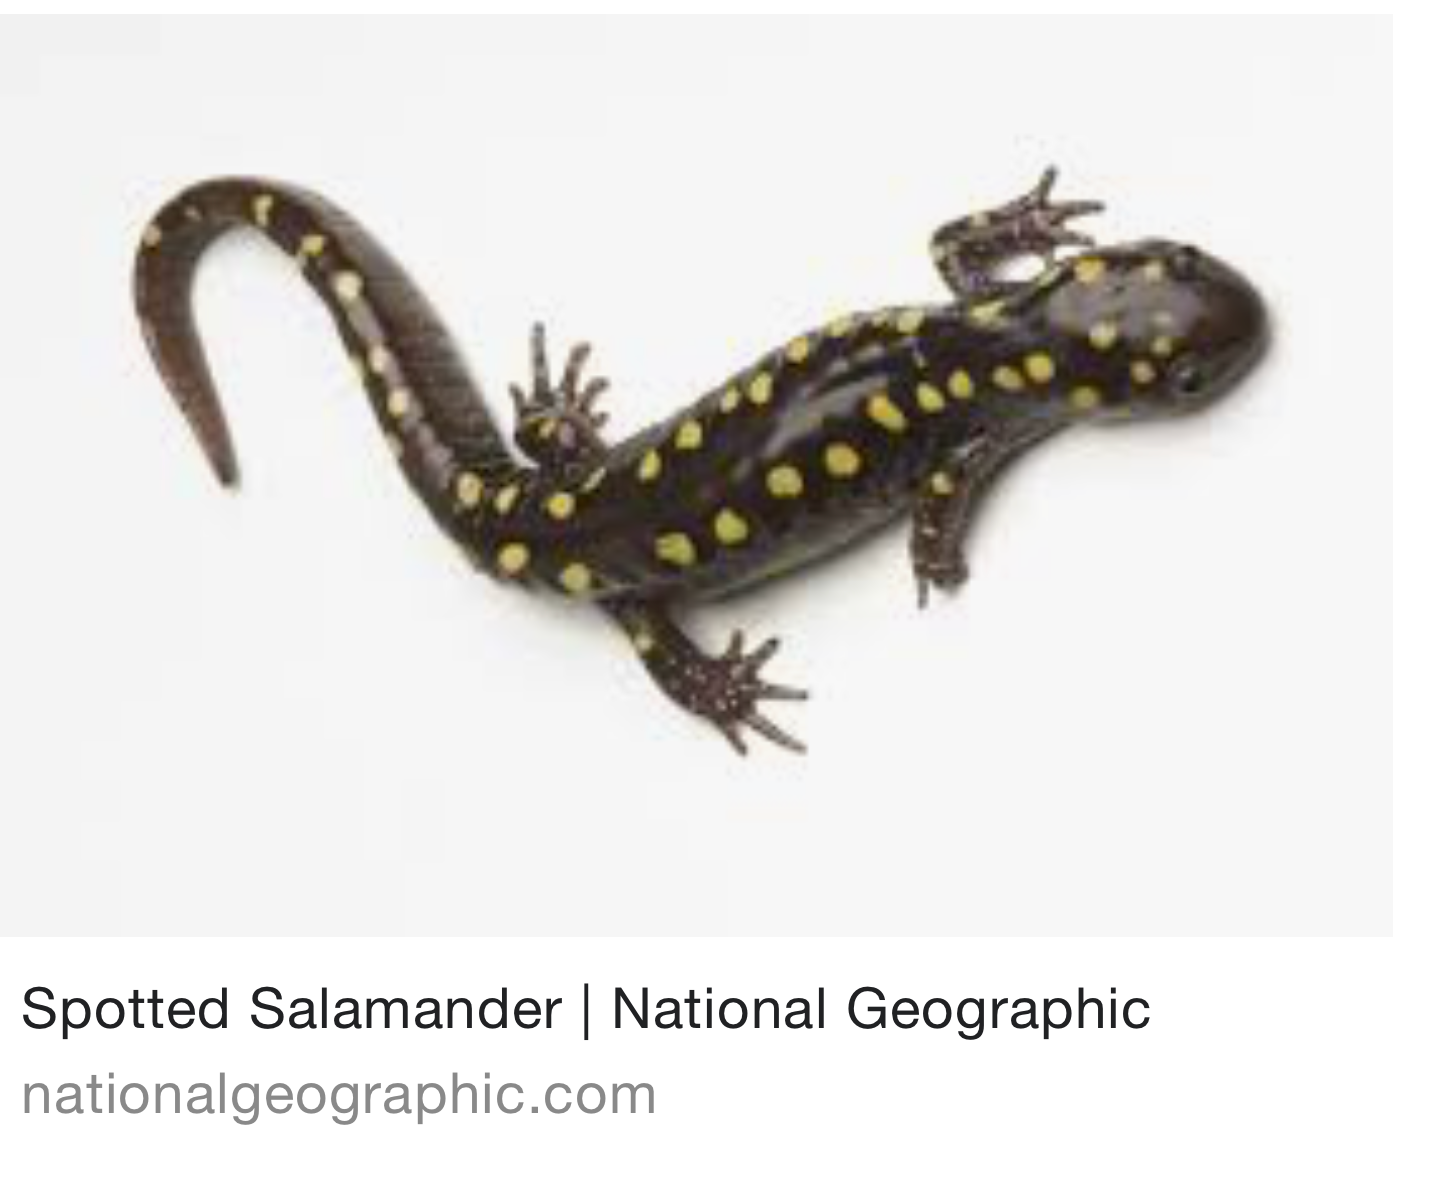
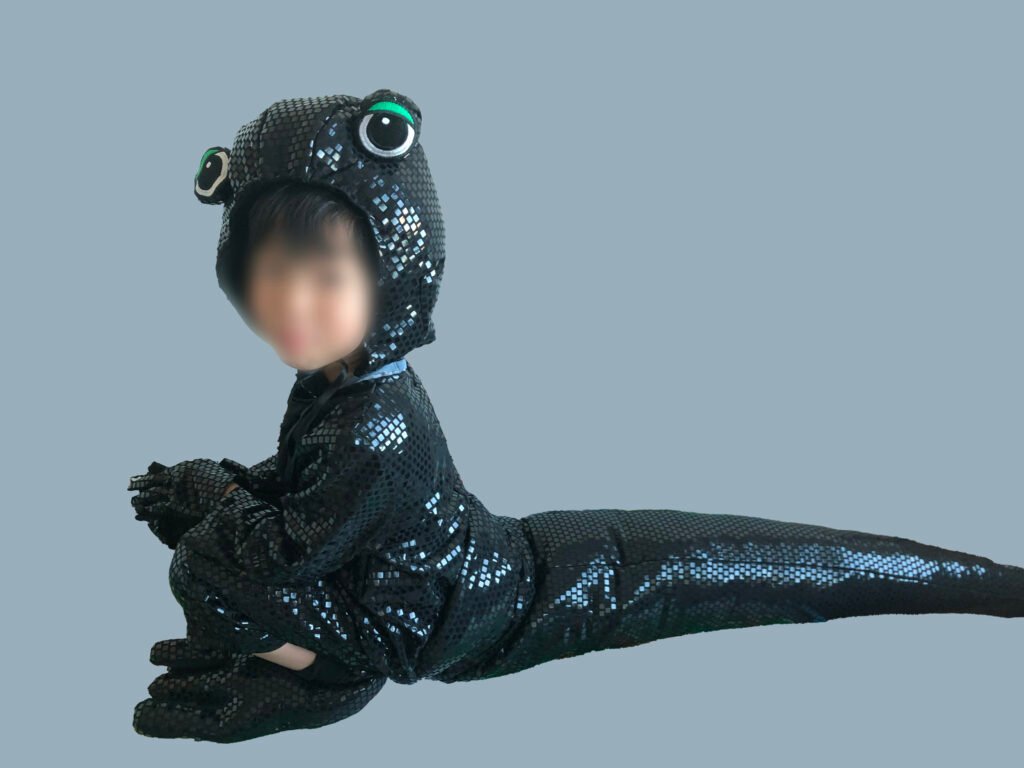
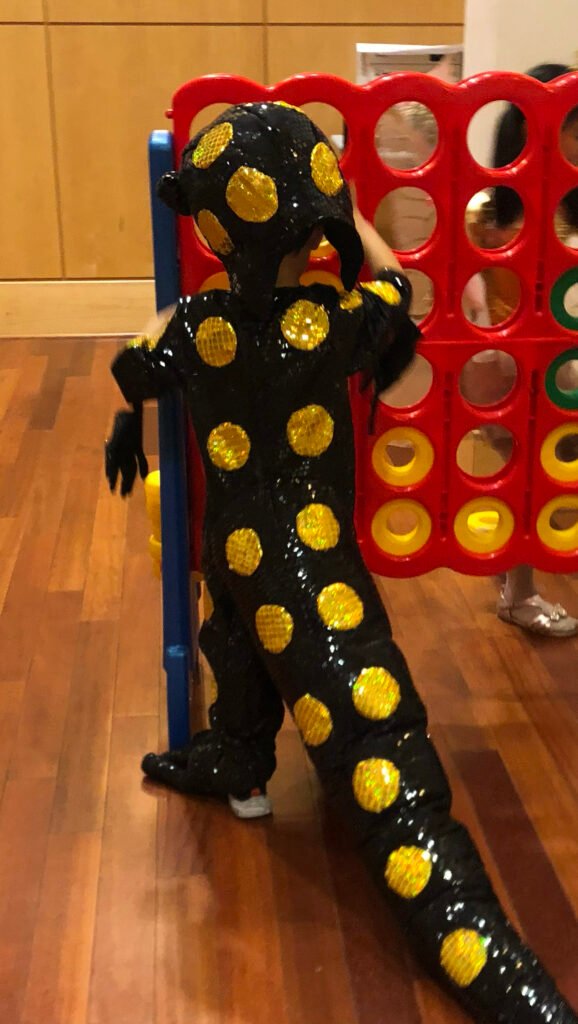
The real animal is the spotted salamander (Ambystoma maculatum) — the same one in my son’s classroom picture from National Geographic. They’re a deep brown-black with two uneven rows of yellow-gold spots running from the head all the way down the tail. Knowing that detail mattered, because it told me exactly what my color story had to be: glossy black, with bright gold dots placed in two rows, not scattered randomly.
Sketch first — it saves you so much fabric
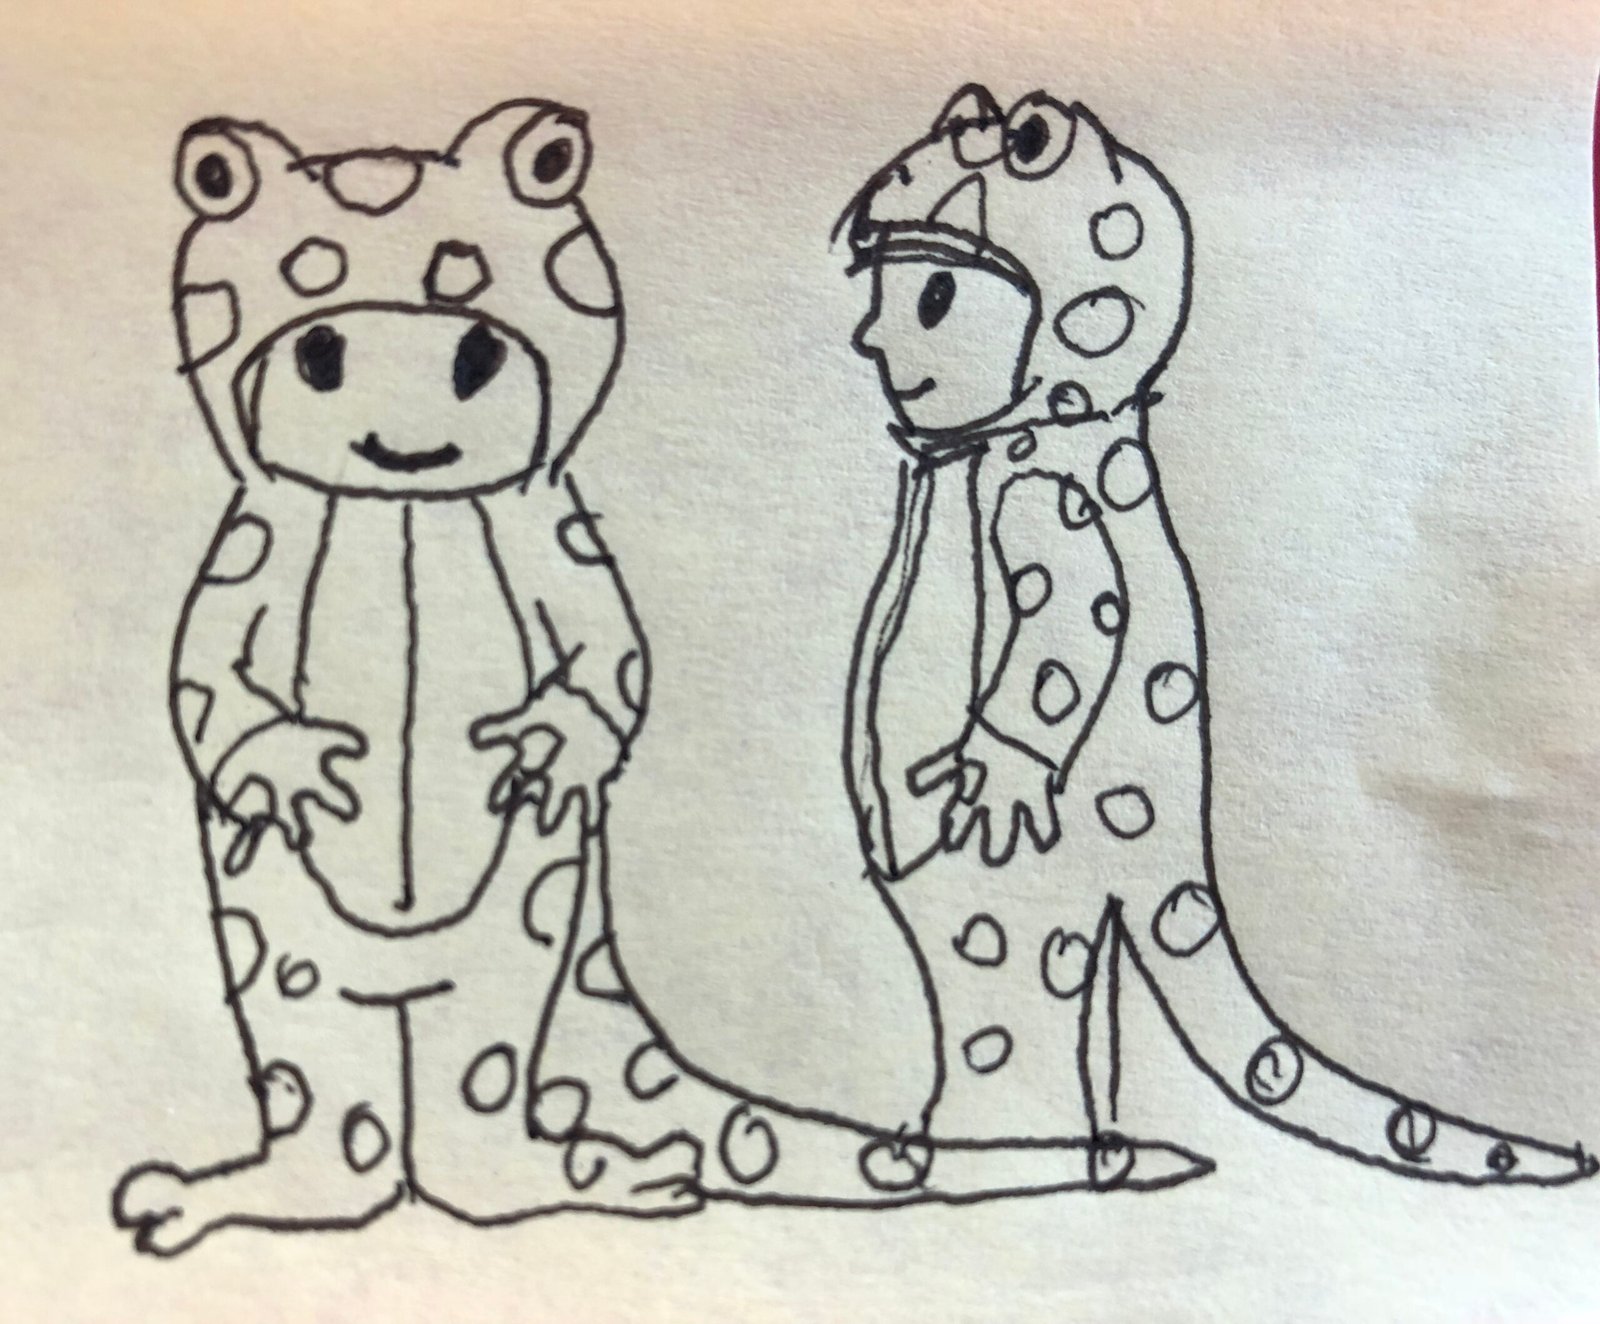
Before I touched a single piece of fabric, I sat down and drew. I sketched two versions of the salamander on a child’s body — one facing forward, one in profile with the tail curling out behind — so I could see how the hood, the spots, the belly and the tail would actually read from the audience.
I can’t stress this enough, especially if you’re new to making things: sketch first. Ten minutes with a pen saves you an hour of unpicking later. The drawing is where you make all your cheap mistakes — where the spots should go, how long the tail can be before a six-year-old trips on it, whether the hood needs eyes. Fabric mistakes are expensive. Paper mistakes are free.
Finding the right fabric (the part I loved most)
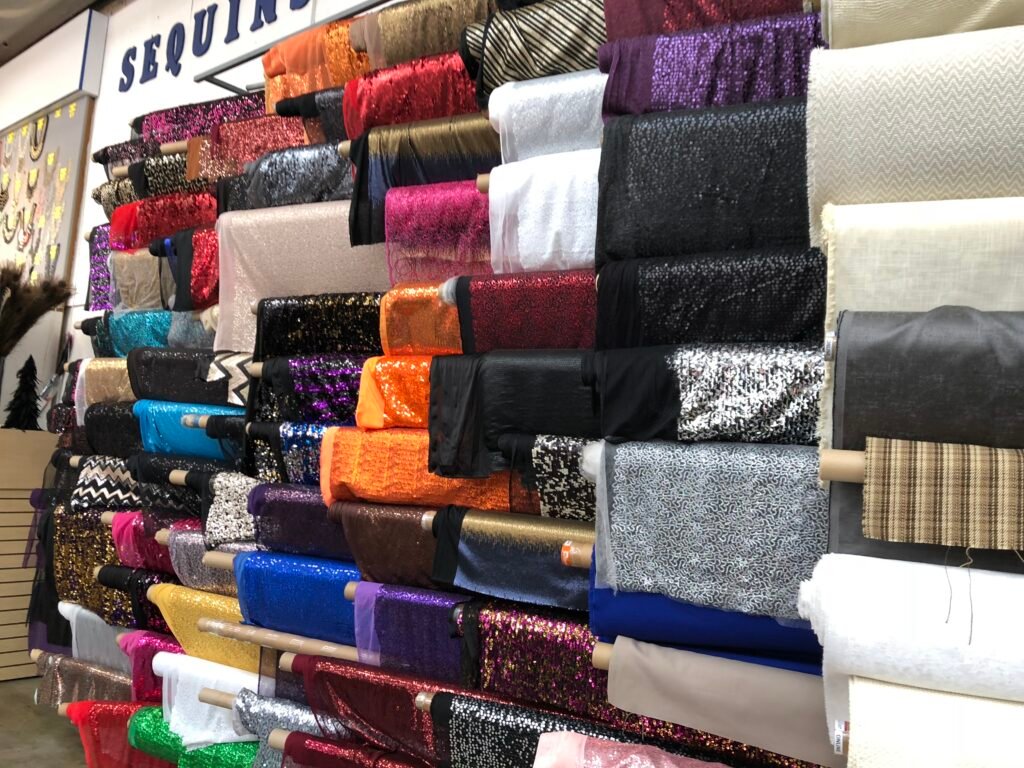
This is where it got fun. I wanted the costume to catch the light on stage — a salamander’s skin is wet and shiny, so a flat matte black would have looked dead under the lights. I went to the fabric store (Mood) and dug through the bolts until I found it: a stretchy black sequined fabric, all little overlapping squares that flash silver when they move.
When I draped it over my arm and it shimmered, I knew. That was the salamander’s skin.
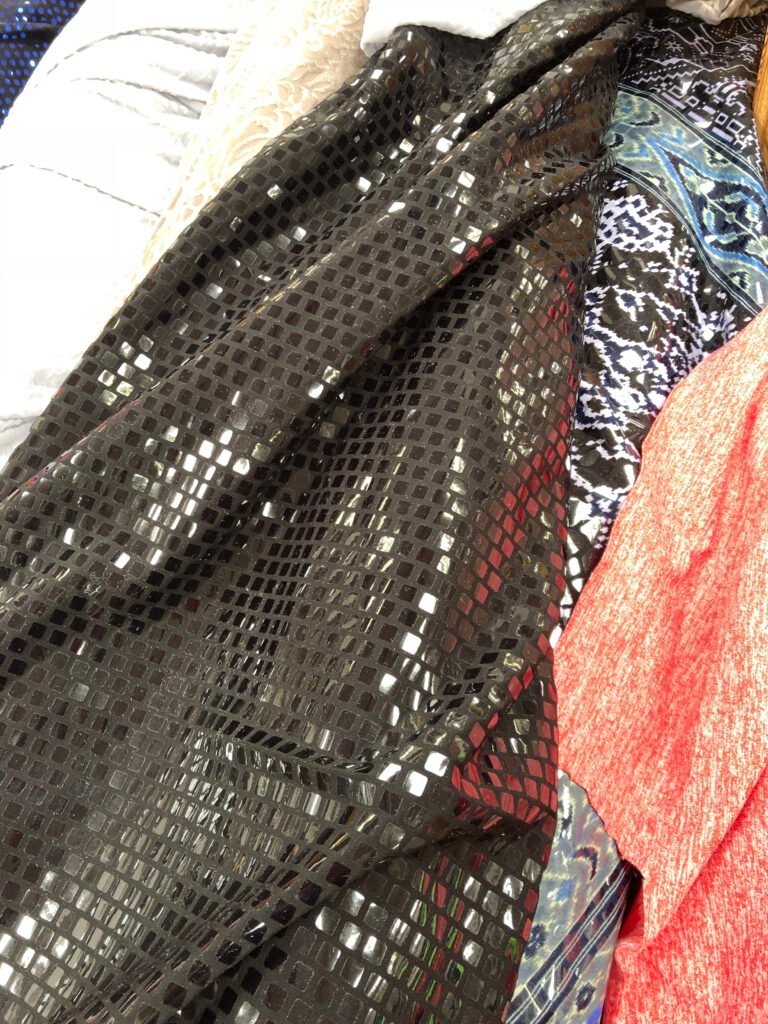
A quick tip from doing this: when you’re choosing costume fabric for a stage, think about how it behaves under light and how it moves, not just how it looks flat on the shelf. A little shimmer reads beautifully from twenty feet away. And stretch fabric is forgiving — it hugs a wiggly kid and survives a lot of squirming.
Building it by hand, one piece at a time
Now the honest part: I didn’t have a sewing machine back then. Every single stitch in this costume was done by hand. I tell you that not to sound heroic, but to reassure you — you can make something real with just a needle, thread, and patience. It takes longer, but it absolutely works.
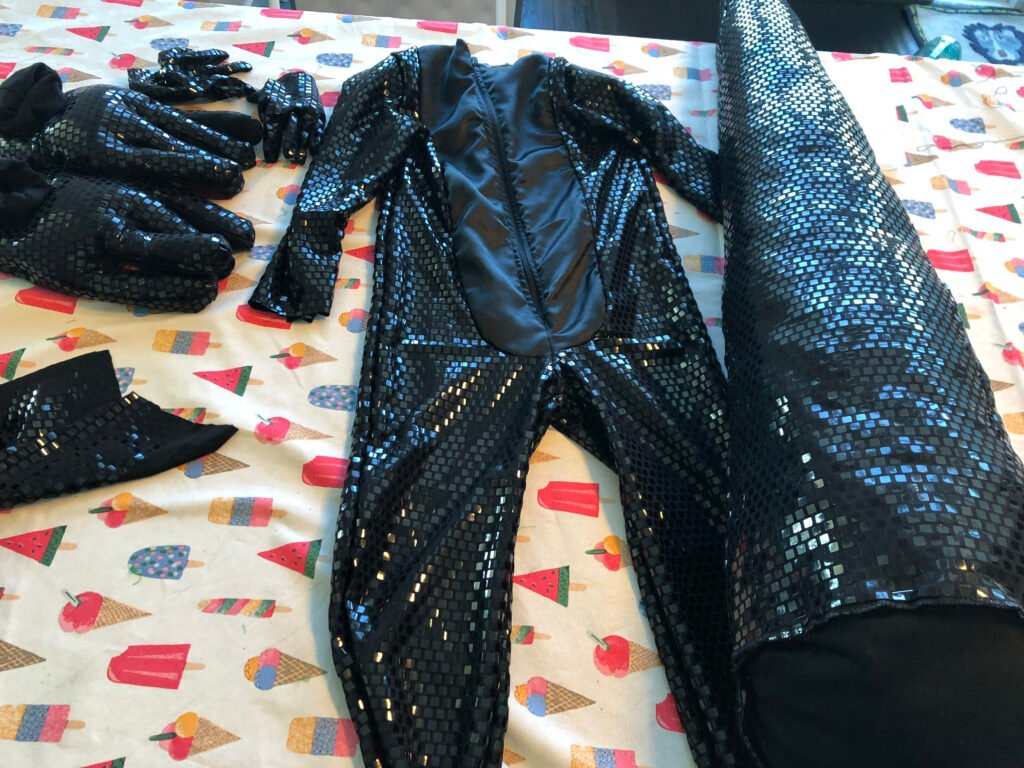
I built the costume the way you’d build any character — in separate pieces, then assembled:
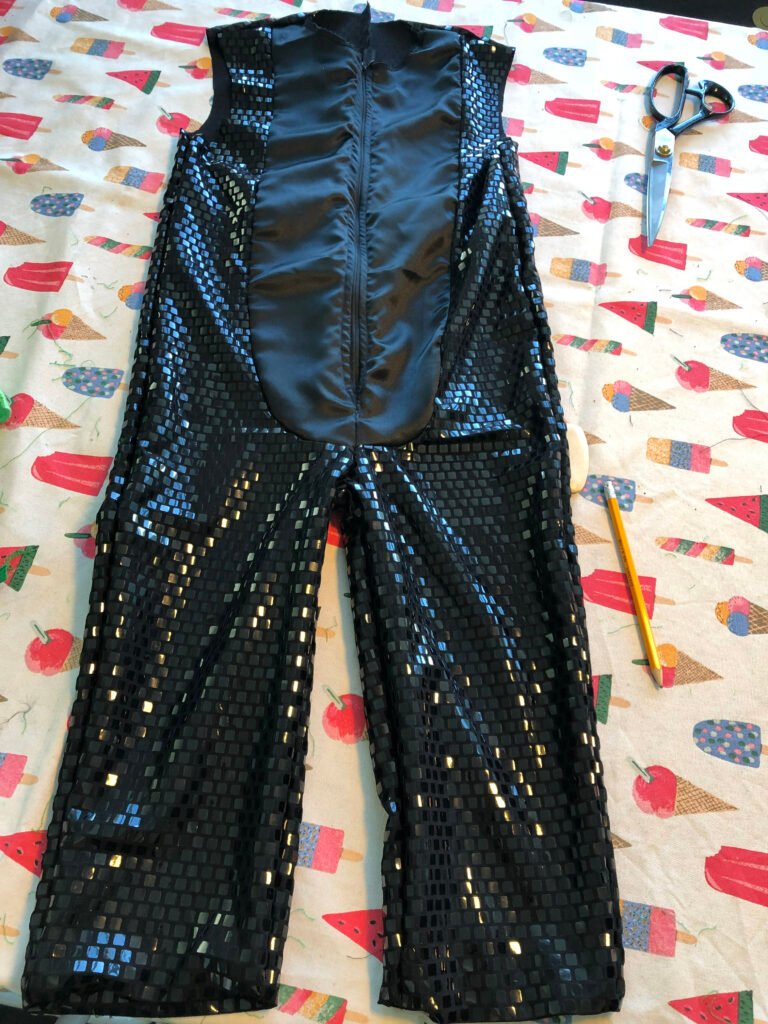
The body suit — a hooded one-piece in the sequined fabric, with a smooth black belly panel down the front (real salamanders have a plain gray belly, so I kept the front simpler than the back).
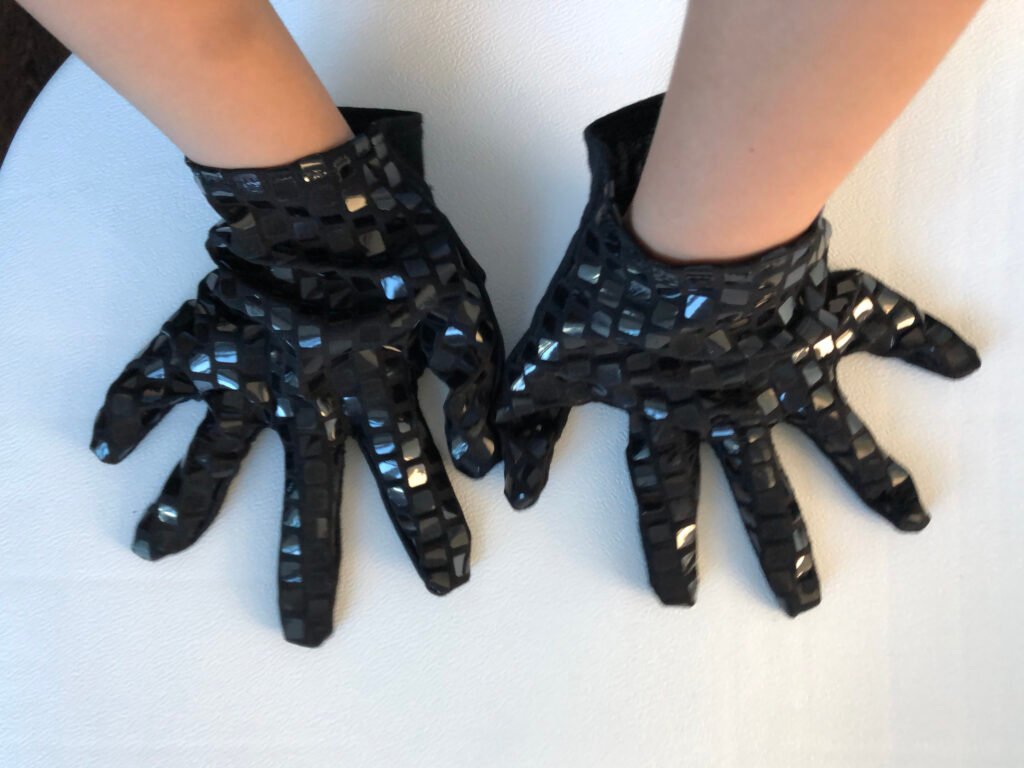
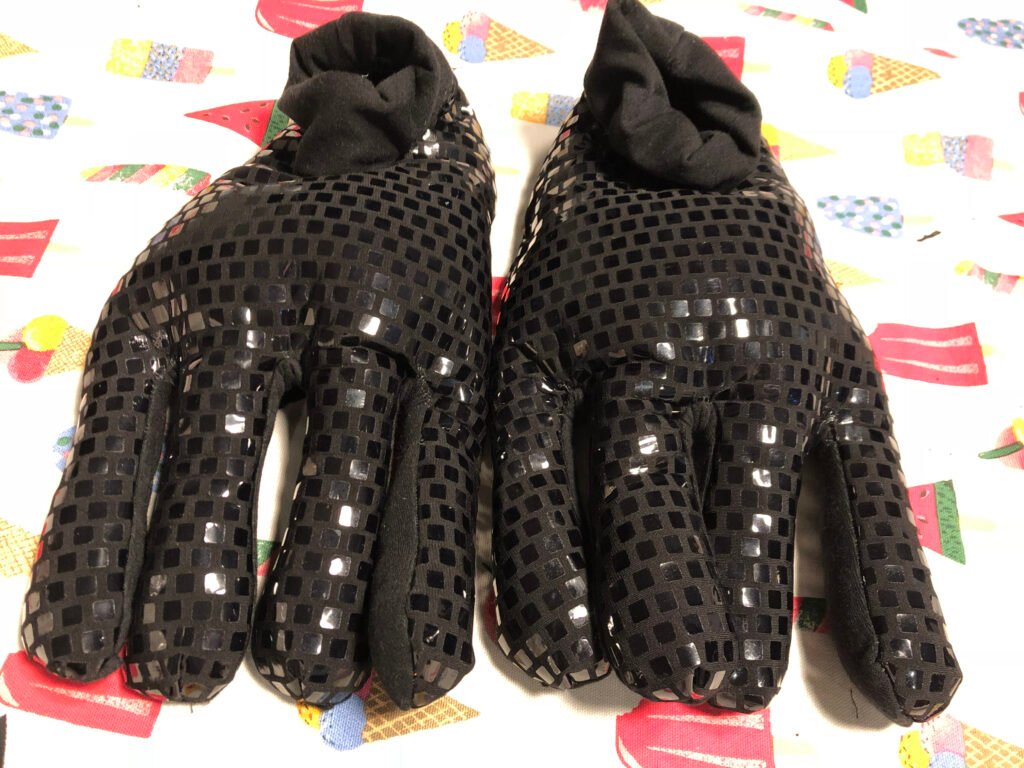
The hands — little sequined gloves, sewn to fit small fingers.
The feet — sequined booties to cover his shoes so the whole silhouette stayed “salamander” from head to toe.
The tail — the showstopper. A long, tapering tail that trailed behind him.
The trick to making it three-dimensional: batting
Here’s the detail I’m proudest of. To keep the hands, the feet, the hood and the tail from looking flat and limp, I stuffed them with batting — that’s the same soft fluff you’d use inside a pillow or a stuffed animal. That’s actually the one thing I borrowed from the dragon costume idea: giving the pieces a little body so they hold a rounded, lifelike shape instead of hanging like empty cloth.
The stuffed gloves gave him chunky little salamander hands. The stuffed feet read as real amphibian toes. And the tail — lightly stuffed so it had shape but wasn’t heavy — actually looked like a tail instead of a sock.
The face that brought it to life
A costume becomes a character at the face. I built the hood up into a proper salamander head and gave it big round eyes with green rims — that’s the moment the whole thing stopped being a black suit and started being an animal. When my son pulled the hood up and peeked out, he wasn’t a kid in a costume anymore. He was the salamander.
The gold spots — placed, not scattered
The last big step was the spots. This is what makes it read instantly as this specific salamander and not just a generic black creature. I used gold-yellow circles and placed them deliberately in two rows down the back and tail, brighter and a touch more orange up near the head, exactly like the reference. Placement is everything — randomly sprinkled dots look like a costume; two intentional rows look like the actual animal.
What I'd tell you if you're about to try this
A few honest lessons from making this whole thing by hand:
Start from the silhouette, then add the truth. A wrong reference (my green dragon) still taught me the right shape. Then I layered in what made it real — the color, the spot placement, the shiny skin.
Sketch before you cut. Always. Your fabric will thank you.
Don’t fear hand-sewing. No machine? You can still do this. Pick a stretchy, forgiving fabric, give yourself a few evenings, and go piece by piece. Slow is fine.
Batting is your friend. A little stuffing turns flat cloth into a real, dimensional creature — hands, feet, tail, head. It’s the cheapest magic in the whole project.
Build the face last and build it with love. The eyes are where your child sees themselves become the character.
And honestly? The very best part wasn’t the applause on performance night, though that was wonderful. It was watching my son look in the mirror and light up — knowing his mom made this, just for him, stitch by stitch. No store could have sold us that.

Frequently asked questions
Q. Can you really make a kids’ animal costume without a sewing machine? A. Yes. I made this entire spotted salamander costume by hand. It takes more time and patience than machine sewing, but a needle and thread will absolutely get you there — especially with a stretchy, forgiving fabric.
Q. There’s no salamander costume for sale anywhere — what do I do? A. Find the closest shape you can buy or picture (for me it was a green dragon costume) and use it purely as a silhouette reference. Then rebuild the real animal’s color, markings and details yourself. The shape is the hard part; the rest is decoration.
Q. How do you make a costume tail or hands look three-dimensional instead of flat? A. Stuff them with batting — the soft fluff used in pillows and stuffed animals. Lightly filling the tail, hands, feet and hood gives them a rounded, lifelike shape so they don’t hang limp.
Q. What fabric works best for a shiny animal costume on stage? A. I used a stretchy black sequined fabric. Under stage lights it shimmers like wet salamander skin, and the stretch makes it comfortable and durable on a moving child. When choosing, think about how the fabric catches light and moves, not just how it looks flat.
Q. How do I get the spotted salamander’s markings right? A. Use a real reference photo. The spotted salamander is black with two uneven rows of yellow-gold spots from head to tail — more orange near the head, more yellow down the body. Place the spots in two deliberate rows rather than scattering them; that’s what makes it instantly recognizable.
One last thought
If you’re staring down a costume that doesn’t exist in any store, please don’t panic — and please don’t underestimate yourself. You don’t need fancy equipment or years of training. You need a clear picture of what you’re making, a little patience, and the willingness to try.
I’d genuinely love to see what you make. If you give a handmade costume a try, tell me about it in the comments — what character, what fabric, what surprised you. And if you’d like me to break down the step-by-step sewing of a piece like the tail or the hood in more detail, let me know and I’ll write that one next.